Better live tagging: Optimized for tablet and cell phone displays
Today we present you a new mode for live tagging, which we have optimized especially for the use of a tablet or larger cell phone. With much more space for what matters -> your individual scheme.
Live-tagging saves time
Live-tagging is your possibility to prepare an analysis already during the competition or training, if you know that you will get the video afterwards. So you can tag all important elements already during the execution and provide a video analysis directly with only a very short time delay.
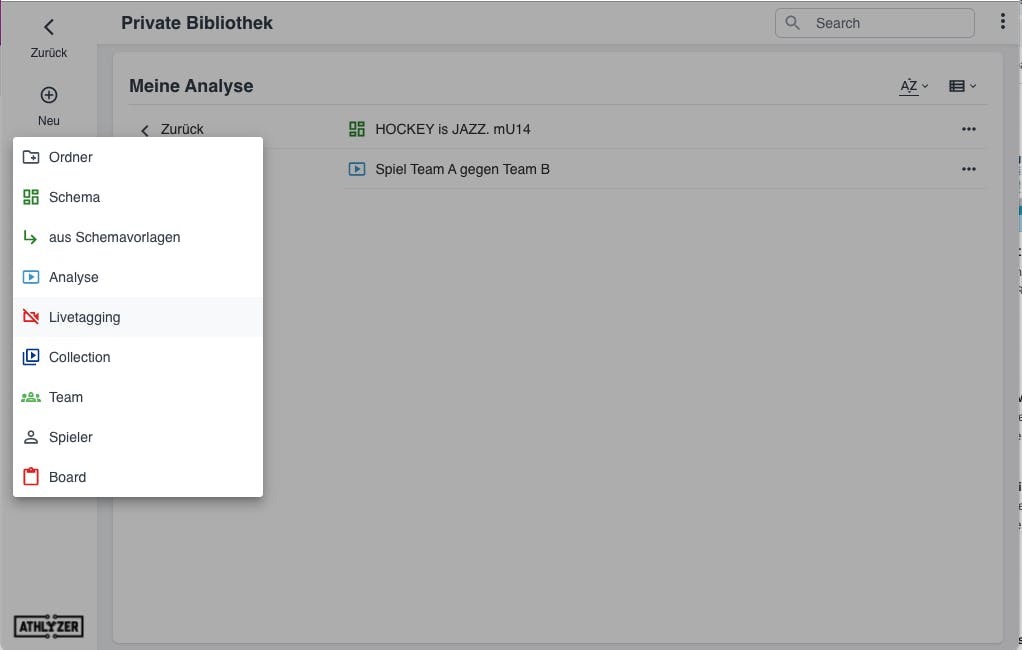
How do I start a live-tagging?
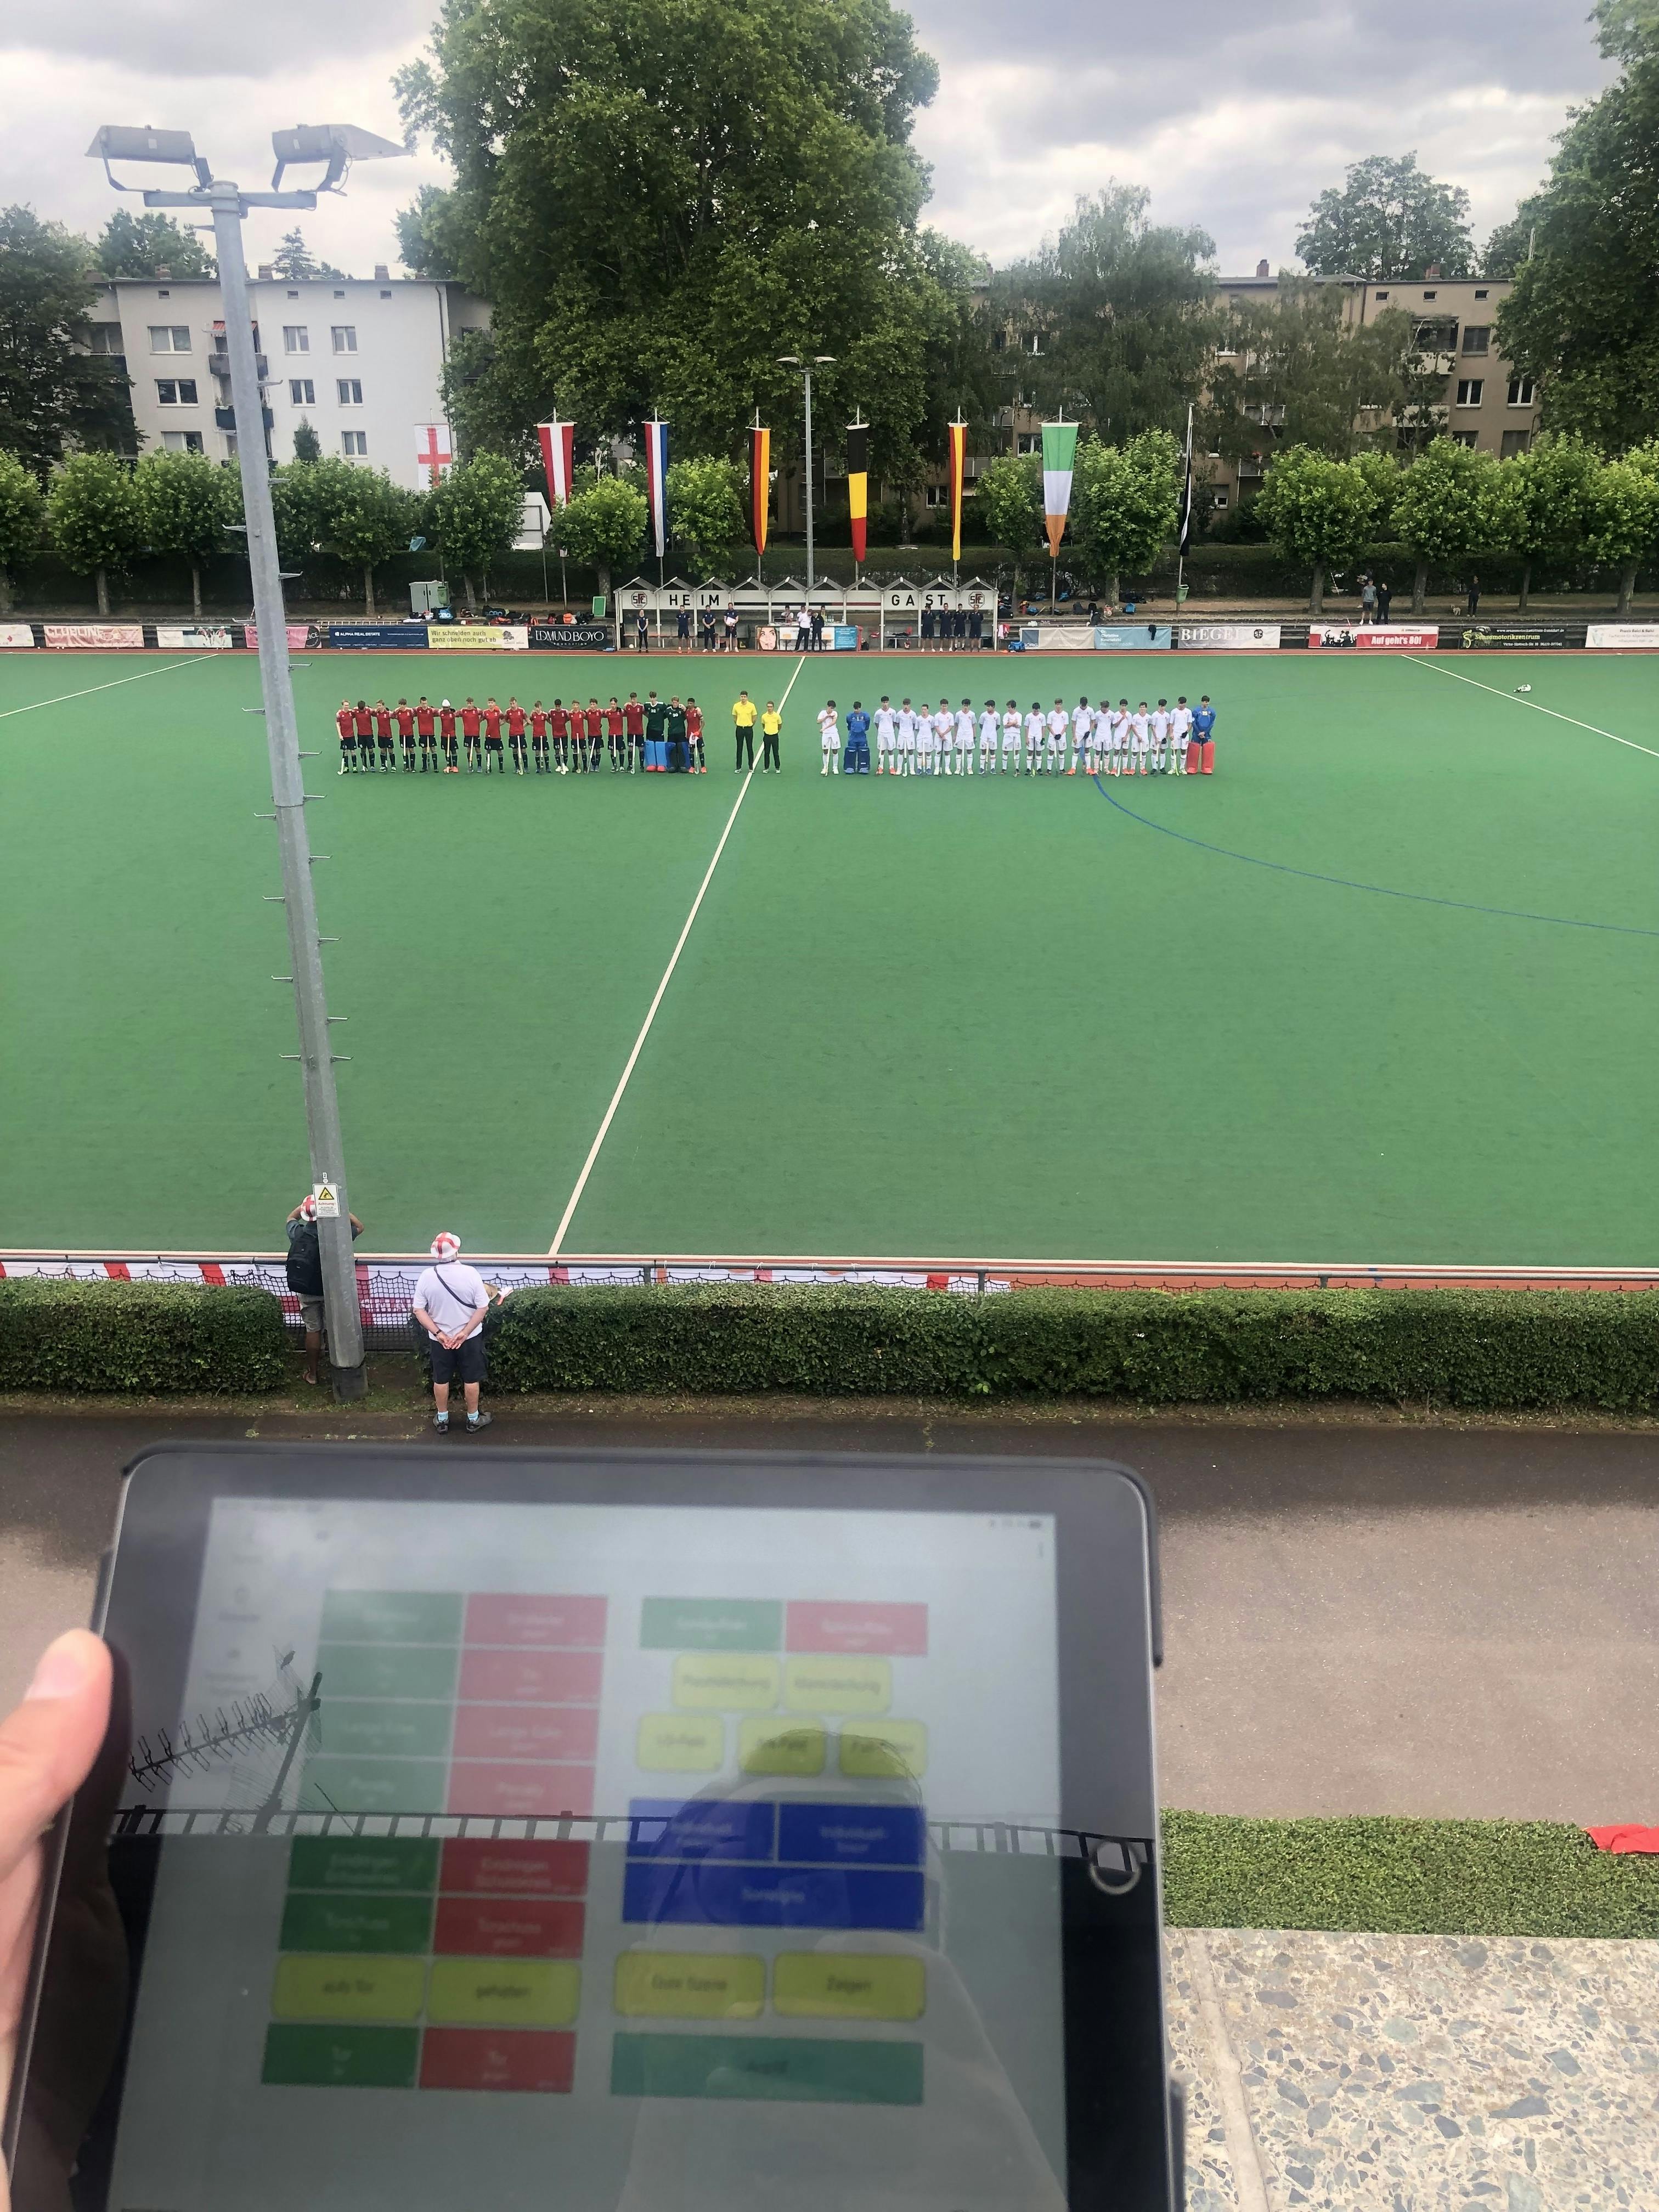
A live tagging is the first part of an analysis that is initially performed without video, because the video recording is only accessible after the game, for example. Click on "New" in the library and then on "Live-tagging". You will now be redirected to the overview.
Click on "New Tagging" in the left menu to open the tagging window. You can adjust your scheme to your screen size by clicking on the Zoom button in the lower right corner. As soon as you want to start tagging click on the play button on the bottom right.
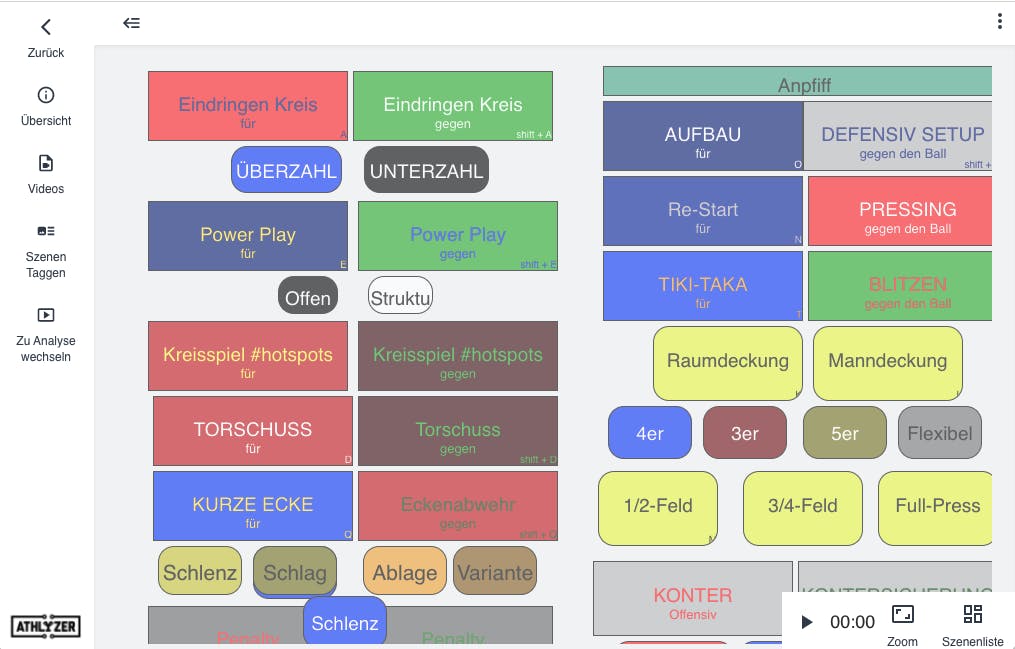
Recommendation: Start exactly with the whistle - then it is especially easy to align live tagging and a video.
Where can I see what I have already tagged?
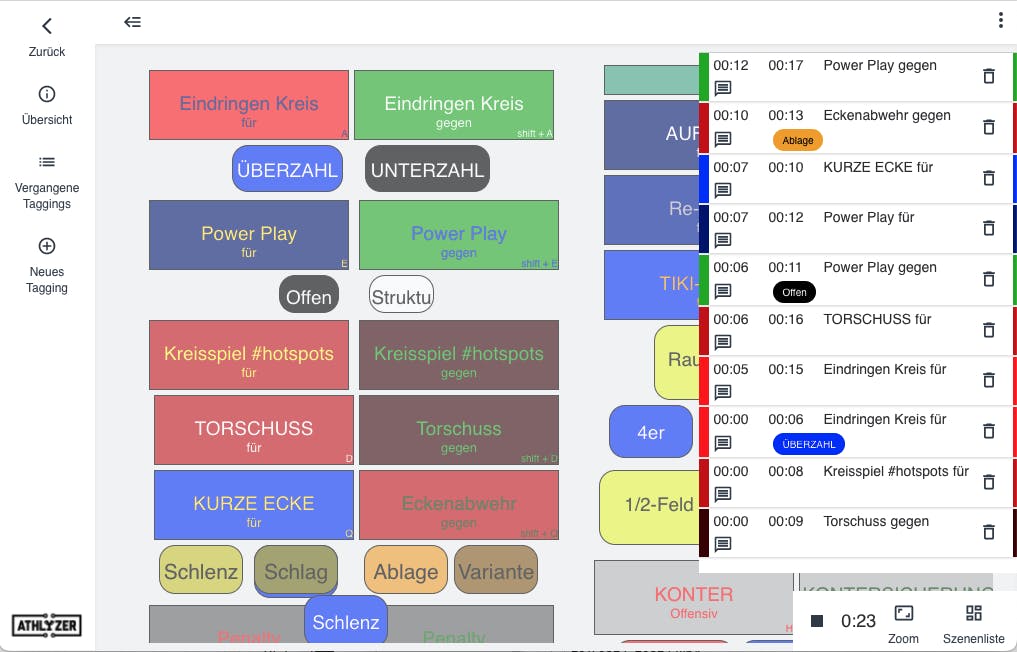
With the button "Scene list" in the lower right corner you can display the already tagged scenes. Normally, however, this is not necessary during live tagging.
What do I do during game pauses?
When you are done tagging, click the STOP button. Recommendation:
a) If the camera continues to run during the breaks (e.g. half-time), then do not stop your live tagging during the breaks.
b) However, if the video recording with the camera is stopped during the break, then we recommend that you also stop the live tagging and create another one after the break via "New tagging". With these two rules, you make it easier for yourself to synchronize the video and live tagging afterwards.
After the game is before the analysis
After you have finished the live tagging you want to connect the live tagging with the video footage. To do this, click on "Past taggings" in the left menu. In the table you can now add a video by clicking on the Camera icon in the Video clip column and then selecting the corresponding game recording.

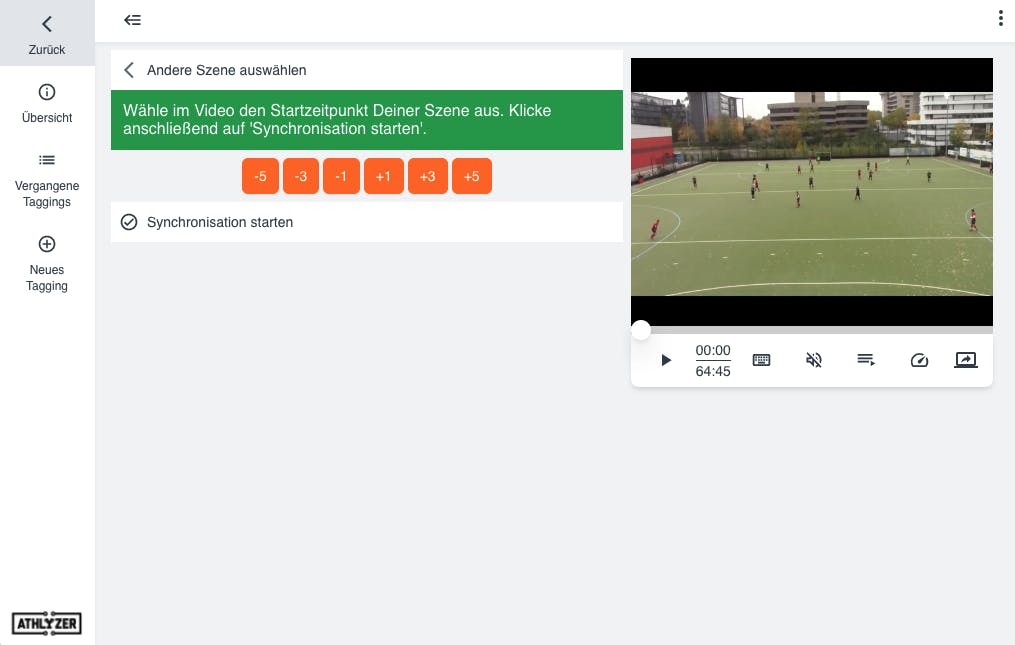
How do I synchronize video and live-tagging?
After you have assigned the video to live-tagging, select the same scene in live-tagging and in the video. A "kickoff" is usually particularly well suited, which is easily recognizable in the video and marks the start in the live-tagging with the time 0:00. When you have aligned this one scene correctly, click Start Synchronization. Now your live tagging is a complete analysis with video material. You can now edit it as usual in the analysis area.